Disclosure:

I am a participant in the Amazon Services LLC Associates Program, an affiliate advertising program designed to provide a means for me to earn fees by linking to Amazon.com and affiliated sites.
Showing posts with label free pattern. Show all posts

Friday, December 9, 2016

Free Crochet Pattern: Chunky Santa Hat


Much like my Elf Hat pattern, this hat is super simple but because it uses bulky yarn you can work this baby up in no time at all! 

Thanks for stopping by!
-Jenni


Skill Level: Easy

Sizes: Toddler, 19-20" head circumference
          Children's, 20-21" head circumference
          Teen/Small Adult, 21-22" head circumference
          Medium/Large Adult, 22-23" head circumference

Supplies:
Bulky (6) Yarn in Red (150-200 yards) & White (50-75 yards)
Size L (8.0 mm) Crochet Hook
Tapestry Needle
Scissors

Abbreviations (US Terms):
BLO - Back Loop Only
Bpdc - Back Post Double Crochet
Ch - Chain
Dc - Double Crochet
Fpdc - Front Post Double Crochet
Sc - Single Crochet
Sl st - Slip Stitch

Gauge:
7dc & 4 rows = 3 inches

Important Notes
-Joins are made with sl st.
-The first dc of each row should be worked in the same space as the ch 1.
-Be careful not to work your fpdc/bpdc's too tightly.

Toddler Size:
(19-20" head circumference)

With Red:
Row 1: Magic circle, ch 1, 8 dc in circle. Join. (8 dc)
Row 2: Ch 1, dc in 3, 2 dc in next, dc in 3, 2 dc in last. Join. (10 dc)
Row 3: Ch 1, dc in 4, 2 dc in next, dc in 4, 2 dc in last. Join. (12 dc)
Row 4: Ch 1, dc in 5, 2 dc in next, dc in 5, 2 dc in last. Join. (14 dc)
Row 5: Ch 1, dc in 6, 2 dc in next, dc in 6, 2 dc in last. Join. (16 dc)
Row 6: Ch 1, dc in 7, 2 dc in next, dc in 7, 2 dc in last. Join. (18 dc)
Row 7: Ch 1, dc in 8, 2 dc in next, dc in 8, 2 dc in last. Join. (20 dc)
Row 8: Ch 1, dc in 9, 2 dc in next, dc in 9, 2 dc in last. Join. (22 dc)
Row 9: Ch 1, dc in 10, 2 dc in next, dc in 10, 2 dc in last. Join. (24 dc)
Row 10: Ch 1, dc in 11, 2 dc in next, dc in 11, 2 dc in last. Join. (26 dc)
Row 11: Ch 1, dc in 12, 2 dc in next, dc in 12, 2 dc in last. Join. (28 dc)
Row 12: Ch 1, dc in 13, 2 dc in next, dc in 13, 2 dc in last. Join. (30 dc)
Row 13: Ch 1, dc in 14, 2 dc in next, dc in 14, 2 dc in last. Join. (32 dc)
Row 14: Ch 1, dc in 15, 2 dc in next, dc in 15, 2 dc in last. Join. (34 dc)
Row 15: Ch 1, dc in 16, 2 dc in next, dc in 16, 2 dc in last. Join. (36 dc)
Row 16: Ch 1, dc in 17, 2 dc in next, dc in 17, 2 dc in last. Join. (38 dc)
Row 17: Ch 1, dc in 18, 2 dc in next, dc in 18, 2 dc in last. Join. (40 dc)
Row 18-20: Ch 1, dc in each space around. Join. (40 dc)

Edge

With White:
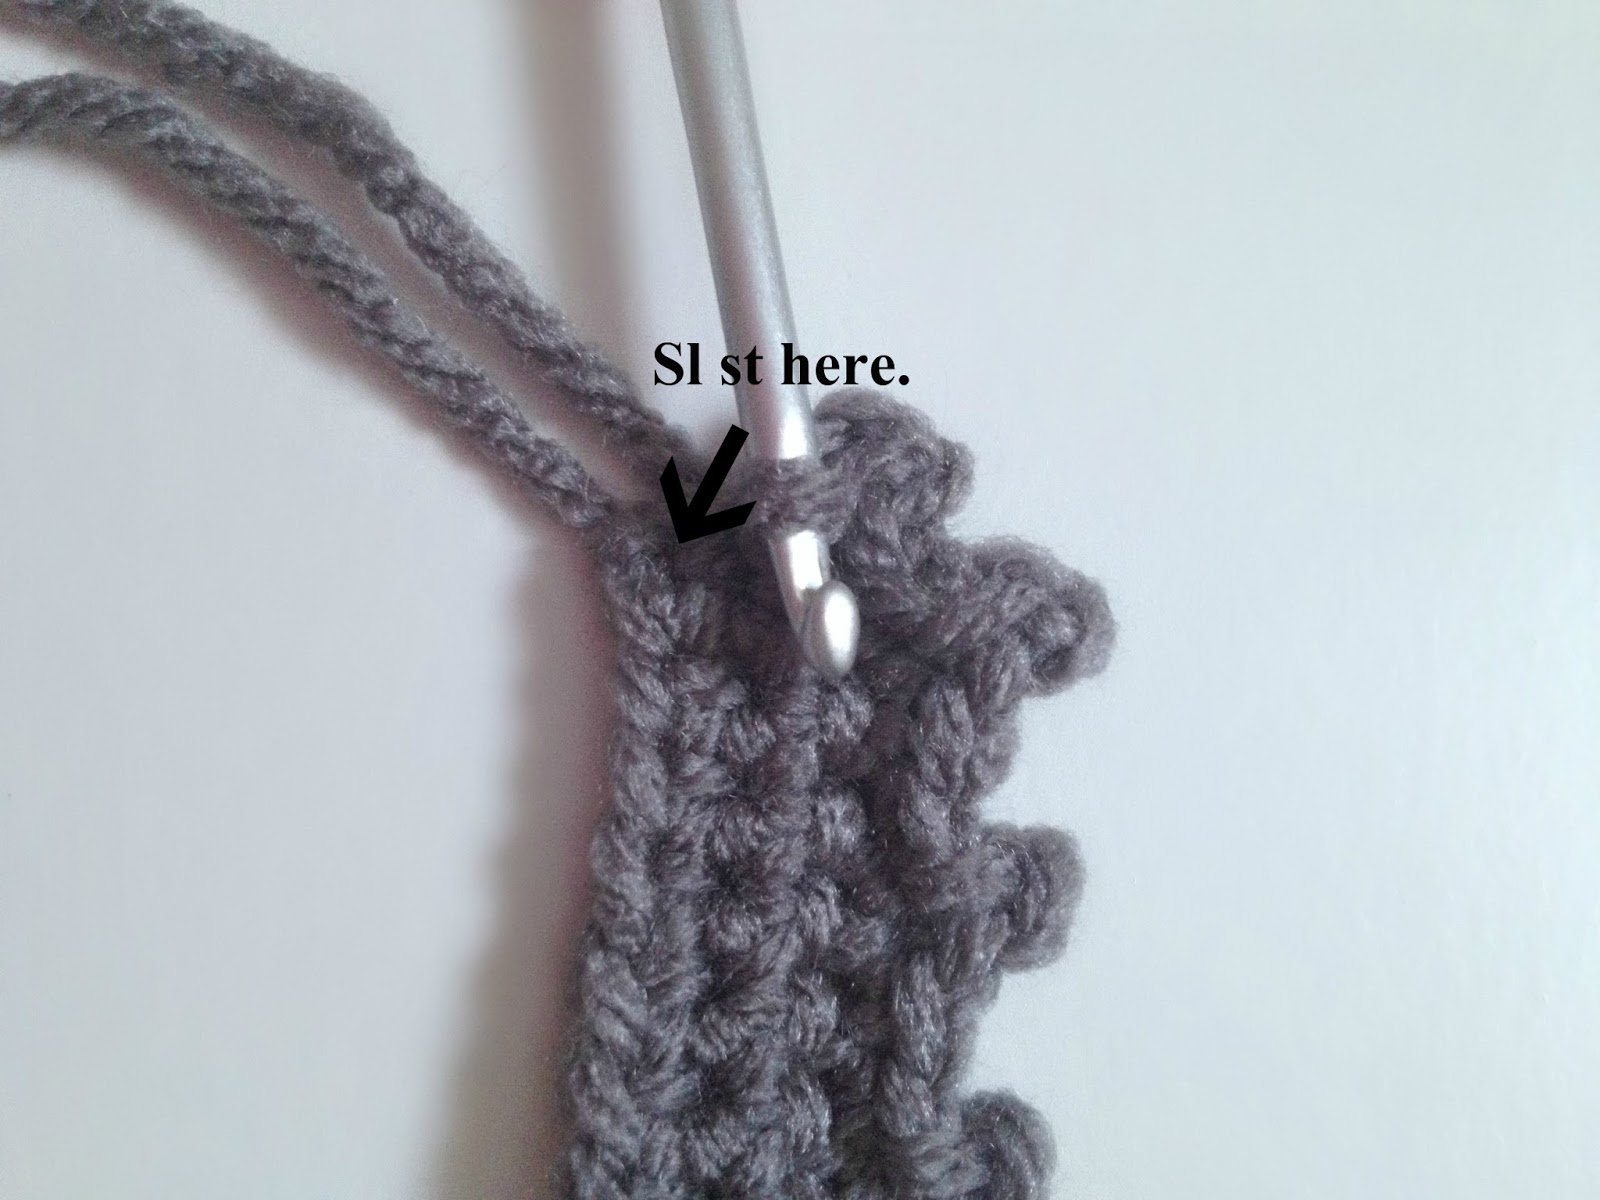
Join with a sl st in any space.

Row 1In BLO: Ch 1, dc in same and in each around. Join. (40 dc)
Row 2: Ch 1, fpdc around first, bpdc around next. *Fpdc around next, bpdc around next.* Repeat *to* around. Join. (20 fpdc, 20 bpdc)
Row 3: Ch 1, sc in each around. Join. (40 sc)
Fasten off and sew in ends.


Children's Size:
(20-21" head circumference)

With Red:
Row 1: Magic circle, ch 1, 8 dc in circle. Join. (8 dc)
Row 2: Ch 1, dc in 3, 2 dc in next, dc in 3, 2 dc in last. Join. (10 dc)
Row 3: Ch 1, dc in 4, 2 dc in next, dc in 4, 2 dc in last. Join. (12 dc)
Row 4: Ch 1, dc in 5, 2 dc in next, dc in 5, 2 dc in last. Join. (14 dc)
Row 5: Ch 1, dc in 6, 2 dc in next, dc in 6, 2 dc in last. Join. (16 dc)
Row 6: Ch 1, dc in 7, 2 dc in next, dc in 7, 2 dc in last. Join. (18 dc)
Row 7: Ch 1, dc in 8, 2 dc in next, dc in 8, 2 dc in last. Join. (20 dc)
Row 8: Ch 1, dc in 9, 2 dc in next, dc in 9, 2 dc in last. Join. (22 dc)
Row 9: Ch 1, dc in 10, 2 dc in next, dc in 10, 2 dc in last. Join. (24 dc)
Row 10: Ch 1, dc in 11, 2 dc in next, dc in 11, 2 dc in last. Join. (26 dc)
Row 11: Ch 1, dc in 12, 2 dc in next, dc in 12, 2 dc in last. Join. (28 dc)
Row 12: Ch 1, dc in 13, 2 dc in next, dc in 13, 2 dc in last. Join. (30 dc)
Row 13: Ch 1, dc in 14, 2 dc in next, dc in 14, 2 dc in last. Join. (32 dc)
Row 14: Ch 1, dc in 15, 2 dc in next, dc in 15, 2 dc in last. Join. (34 dc)
Row 15: Ch 1, dc in 16, 2 dc in next, dc in 16, 2 dc in last. Join. (36 dc)
Row 16: Ch 1, dc in 17, 2 dc in next, dc in 17, 2 dc in last. Join. (38 dc)
Row 17: Ch 1, dc in 18, 2 dc in next, dc in 18, 2 dc in last. Join. (40 dc)
Row 18: Ch 1, dc in 19, 2 dc in next, dc in 19, 2 dc in last. Join. (42 dc)
Row 19-21: Ch 1, dc in each space around. Join. (42 dc)

Edge

With White:
Join with a sl st in any space.

Row 1In BLO: Ch 1, dc in same and in each around. Join. (42 dc)
Row 2: Ch 1, fpdc around first, bpdc around next. *Fpdc around next, bpdc around next.* Repeat *to* around. Join. (21 fpdc, 21 bpdc)
Row 3: Ch 1, sc in each around. Join. (42 sc)
Fasten off and sew in ends.


Teen/Small Adult Size:
(21-22" head circumference)

With Red:
Row 1: Magic circle, ch 1, 8 dc in circle. Join. (8 dc)
Row 2: Ch 1, dc in 3, 2 dc in next, dc in 3, 2 dc in last. Join. (10 dc)
Row 3: Ch 1, dc in 4, 2 dc in next, dc in 4, 2 dc in last. Join. (12 dc)
Row 4: Ch 1, dc in 5, 2 dc in next, dc in 5, 2 dc in last. Join. (14 dc)
Row 5: Ch 1, dc in 6, 2 dc in next, dc in 6, 2 dc in last. Join. (16 dc)
Row 6: Ch 1, dc in 7, 2 dc in next, dc in 7, 2 dc in last. Join. (18 dc)
Row 7: Ch 1, dc in 8, 2 dc in next, dc in 8, 2 dc in last. Join. (20 dc)
Row 8: Ch 1, dc in 9, 2 dc in next, dc in 9, 2 dc in last. Join. (22 dc)
Row 9: Ch 1, dc in 10, 2 dc in next, dc in 10, 2 dc in last. Join. (24 dc)
Row 10: Ch 1, dc in 11, 2 dc in next, dc in 11, 2 dc in last. Join. (26 dc)
Row 11: Ch 1, dc in 12, 2 dc in next, dc in 12, 2 dc in last. Join. (28 dc)
Row 12: Ch 1, dc in 13, 2 dc in next, dc in 13, 2 dc in last. Join. (30 dc)
Row 13: Ch 1, dc in 14, 2 dc in next, dc in 14, 2 dc in last. Join. (32 dc)
Row 14: Ch 1, dc in 15, 2 dc in next, dc in 15, 2 dc in last. Join. (34 dc)
Row 15: Ch 1, dc in 16, 2 dc in next, dc in 16, 2 dc in last. Join. (36 dc)
Row 16: Ch 1, dc in 17, 2 dc in next, dc in 17, 2 dc in last. Join. (38 dc)
Row 17: Ch 1, dc in 18, 2 dc in next, dc in 18, 2 dc in last. Join. (40 dc)
Row 18: Ch 1, dc in 19, 2 dc in next, dc in 19, 2 dc in last. Join. (42 dc)
Row 19: Ch 1, dc in 20, 2 dc in next, dc in 20, 2 dc in last. Join. (44 dc)
Row 20-22: Ch 1, dc in each space around. Join. (44 dc)

Edge

With White:
Join with a sl st in any space.

Row 1In BLO: Ch 1, dc in same and in each around. Join. (44 dc)
Row 2-3: Ch 1, fpdc around first, bpdc around next. *Fpdc around next, bpdc around next.* Repeat *to* around. Join. (22 fpdc, 22 bpdc)
Row 4: Ch 1, sc in each around. Join. (44 sc)
Fasten off and sew in ends.


Medium/Large Adult Size:
(22-23" head circumference)

With Red:
Row 1: Magic circle, ch 1, 8 dc in circle. Join. (8 dc)
Row 2: Ch 1, dc in 3, 2 dc in next, dc in 3, 2 dc in last. Join. (10 dc)
Row 3: Ch 1, dc in 4, 2 dc in next, dc in 4, 2 dc in last. Join. (12 dc)
Row 4: Ch 1, dc in 5, 2 dc in next, dc in 5, 2 dc in last. Join. (14 dc)
Row 5: Ch 1, dc in 6, 2 dc in next, dc in 6, 2 dc in last. Join. (16 dc)
Row 6: Ch 1, dc in 7, 2 dc in next, dc in 7, 2 dc in last. Join. (18 dc)
Row 7: Ch 1, dc in 8, 2 dc in next, dc in 8, 2 dc in last. Join. (20 dc)
Row 8: Ch 1, dc in 9, 2 dc in next, dc in 9, 2 dc in last. Join. (22 dc)
Row 9: Ch 1, dc in 10, 2 dc in next, dc in 10, 2 dc in last. Join. (24 dc)
Row 10: Ch 1, dc in 11, 2 dc in next, dc in 11, 2 dc in last. Join. (26 dc)
Row 11: Ch 1, dc in 12, 2 dc in next, dc in 12, 2 dc in last. Join. (28 dc)
Row 12: Ch 1, dc in 13, 2 dc in next, dc in 13, 2 dc in last. Join. (30 dc)
Row 13: Ch 1, dc in 14, 2 dc in next, dc in 14, 2 dc in last. Join. (32 dc)
Row 14: Ch 1, dc in 15, 2 dc in next, dc in 15, 2 dc in last. Join. (34 dc)
Row 15: Ch 1, dc in 16, 2 dc in next, dc in 16, 2 dc in last. Join. (36 dc)
Row 16: Ch 1, dc in 17, 2 dc in next, dc in 17, 2 dc in last. Join. (38 dc)
Row 17: Ch 1, dc in 18, 2 dc in next, dc in 18, 2 dc in last. Join. (40 dc)
Row 18: Ch 1, dc in 19, 2 dc in next, dc in 19, 2 dc in last. Join. (42 dc)
Row 19: Ch 1, dc in 20, 2 dc in next, dc in 20, 2 dc in last. Join. (44 dc)
Row 20: Ch 1, dc in 21, 2 dc in next, dc in 21, 2 dc in last. Join. (46 dc)
Row 21-23: Ch 1, dc in each space around. Join. (46 dc)
Fasten off.

Edge

With White:
Join with a sl st in any space.

Row 1: In BLO: Ch 1, dc in same and in each around. Join. (46 dc)
Row 2-3: Ch 1, fpdc around first, bpdc around next. *Fpdc around next, bpdc around next.* Repeat *to* around. Join. (23 fpdc, 23 bpdc)
Row 4: Ch 1, sc in each around. Join. (46 sc)
Fasten off and sew in ends.


Pom-Pom

With white:
(1) Begin by laying out a strand of yarn about 18" in length. (2) Using your hand with your fingers slightly spaced, (3) wrap yarn around your hand 50-70 times. (4) Carefully slip the yarn off your hand and place it centered on top of the 18" strand. (5) Tie a knot twice. (6) With your tapestry needle secure the center of the pom-pom by sewing through the center with each end a few times. (7) This next part is optional but I like to make sure my pom-poms are very secure so next I run a bead of either fabric or Elmer's glue around the center. Let the glue dry. (8) Cut through each loop. (9) Trim pom-pom to desired size being sure not to trim the original 18" strand. Use this strand to sew the pom-pom to the top of the hat.

(Click to view larger)

(Shown in Berry Red & White)

Monday, November 14, 2016

Free Crochet Pattern: Stash Buster Chunky Throw Blanket


My yarn stash has grown out of control and I've been trying to make good use of all the extra yarn from past projects so today I am sharing with you one of the easiest ways I have found to use up lots of yarn! This pattern calls for holding two strands of worsted weight yarn together (you can also use bulky 6 yarn) to create a thicker yarn. I have used a mix of all sorts of brands, if you are interested in the exact brands and colors I used for both of my example blankets scroll down below the pattern for a detailed list.

Thanks so much for stopping by and reading!
-Jenni


Finished size: Approx. 60" x 45"
                        Note: If you would like your blanket to be wider than 45" simply 
                                 start with a longer beginning chain. You may also want to add 
                                 additional rows to the end of the blanket if you do this.

Difficulty Level: Beginner

Supplies:
Worsted Weight Yarn
      -Each row will use approx. 38 yards total, 19 yards per strand.
      -Your border will use a lot of yarn, approx. 700 yards total.
Size L (8.0mm) Crochet Hook
Tapestry needle
Scissors

Abbreviations (US Terms):
Ch - Chain
Dc - Double Crochet
Sc - Single Crochet
Sl St - Slip Stitch

Important Notes:
-Your first stitch of each row will always be worked in the same space as the ch 1.
-Sew in your ends as you go, you'll thank yourself later if you do this.

Gauge:
7 rows & 13 stitches = 5"


Blanket

Holding 2 strands of worsted weight yarn together:

Row 1: Ch 94, dc in 3rd ch from hook and in each ch across.
Row 2-4: Ch 1, turn. Dc in each across.
Fasten off and join new color with a sl st.

Row 5-6: Ch 1, turn. Dc in each across.
Fasten off and join new color with a sl st.

Row 7-9: Ch 1, turn. Dc in each across.
Fasten off and join new color with a sl st.

Row 10: Row 5-6: Ch 1, turn. Dc in each across.
Fasten off and join new color with a sl st.

Row 11-14: Ch 1, turn. Dc in each across.
Fasten off and join new color with a sl st.

Row 15-16: Ch 1, turn. Dc in each across.
Fasten off and join new color with a sl st.

Row 17-19: Ch 1, turn. Dc in each across.
Fasten off and join new color with a sl st.

Row 20: Row 5-6: Ch 1, turn. Dc in each across.
Fasten off and join new color with a sl st.

Continue to repeat rows 11-20 until you reach 80 rows total.

Fasten off and if you didn't sew in your ends as you went, do so now.


Border

Holding 2 strands of worsted weight yarn together:

Join with a sl st in any space.

Row 1: Ch 1, sc around the edge of the blanket, ch 2 at each corner. Join.

(click to enlarge)

You should have approx. 160 sc down the long sides of the blanket. If you are a few off, that's ok but you don't want much more than 160.

If your edge is not perfectly straight after your first few rows don't worry, it should straighten out by the time you complete all 7 rows. Below is my fall colors throw after row 1 & then again after row 7.


Row 2-7: Ch 1, sc in each around, when you reach each corner space work all of the following into the corner: [sc, ch 2, sc]. Join.

Fasten off after row 7 and sew in ends.


Fall Colors Throw Yarn List
For this blanket I tried a few rows with a bulky 6 yarn and it worked up great next tp the two strands of worsted weight yarn.


Rows 1-4: Red Heart Super Saver, Claret
Rows 5-6: Big Twist Premium, Navy
Rows 7-9: Bernat Softee Chunky, Grey Ragg
Row 10: Red Heart Super Saver, Grey Heather
Row 11-14: I Love This Yarn!, Sungold
Row 15-16: Caron One Pound, Deep Violet
Row 17-19: Lion Brand Vanna's Choice, Dusty Blue
Row 20: Lion Brand Vanna's Choice, Terra Cotta
Row 21-24: I Love This Yarn!, Dark Olive
Row 25-26: Red Heart Super Saver, Claret
Row 27-29: Big Twist Value, Soft Gray
Row 30: Big Twist Premium, Navy
Row 31-34:  I Love This Yarn!, Coffee
Row 35-36: I Love This Yarn!, Key Lime
Row 37-39: Caron One Pound, Deep Violet
Row 40: Bernat Softee Chunky, Grey Ragg
Row 41-44: I Love This Yarn!, Sungold
Row 45-46: Red Heart With Love, Black
Row 47-49: Red Heart Super Saver, Claret
Row 50: Lion Brand Vanna's Choice, Dusty Blue
Row 51-54: I Love This Yarn!, Graphite
Row 55-56: Lion Brand Vanna's Choice, Terra Cotta
Row 57-59: I Love This Yarn!, Coffee
Row 60: Lion Brand Vanna's Choice, Dusty Purple
Row 61-64: Big Twist Premium, Navy
Row 65-66: I Love This Yarn!, Dark Olive
Row 67-69: Bernat Softee Chunky, Grey Ragg
Row 70: Red Heart With Love, Hot Pink
Row 71-74: I Love This Yarn!, Sungold
Row 75-76: Red Heart Super Saver, Claret
Row 77-79: Big Twist Value, Soft Gray
Row 80: Caron One Pound, Deep Violet

Border: Red Heart With Love, Black


Spring Colors Throw Yarn List


Rows 1-4: I Love This Yarn!, Amethyst
Rows 5-6: I Love This Yarn!, Keylime
Rows 7-9: I Love This Yarn!, Stonewash
Row 10: Red Heart With Love, Violet
Row 11-14: Red Heart With Love, Papaya
Row 15-16: I Love This Yarn!, Orchid
Row 17-19: Red Heart With Love, Jadeite
Row 20: Lion Brand Vanna's Choice, Terra Cotta
Row 21-24: Red Heart Super Saver, Delft Blue
Row 25-26: Big Twist Value, Light Rose
Row 27-29: I Love This Yarn!, Amethyst
Row 30: Red Heart With Love, Daffodil
Row 31-34: Red Heart With Love, Hot Pink
Row 35-36: I Love This Yarn!, Turquoise
Row 37-39: Red Heart Super Saver, Dark Orchid
Row 40: Red Heart Super Saver, Light Blue
Row 41-44: Red Heart Super Saver, Tea Leaf
Row 45-46: Caron Simply Soft, Soft Pink
Row 47-49: I Love This Yarn!, Orchid
Row 50: Red Heart With Love, Daffodil
Row 51-54: Red Heart With Love, Papaya
Row 55-56: Red Heart With Love, Jadeite
Row 57-59: I Love This Yarn!, Stonewash
Row 60: Lion Brand Vanna's Choice, Terra Cotta
Row 61-64: I Love This Yarn!, Amethyst
Row 65-66: Big Twist Value, Light Rose
Row 67-69: Lion Brand Vanna's Choice, Colonial Blue
Row 70: Red Heart With Love, Daffodil
Row 71-74: I Love This Yarn!, Turquoise
Row 75-76: Red Heart With Love, Hot Pink
Row 77-79: I Love This Yarn!, Orchid
Row 80: Red Heart Super Saver, Spring Green

Border: Red Heart With Love, White

Friday, September 2, 2016

Free Crochet Pattern: Men's Chunky Stripe Scarf

(Shown in Bernat Softee Chunky Clay & Black)

Hi! Today I am sharing the matching scarf to the Men's Chunky Stripe Beanie from yesterday, both of these patterns work up quickly and make excellent gifts! This pattern calls for Bernat Softee Chunky yarn but I have also tested it using 2 strands of Red Heart With Love (worsted weight) held together, just be sure to check your gauge. The gauge is especially important for the hat pattern. 

Thanks for stopping by and checking out my pattern,
 if you have any questions feel free to ask! 
-Jenni


Difficulty Level: Easy

Size: Men’s

Supplies:
Bernat Chunky Yarn, Super Bulky (6)
         -Main color approx. 330-350 yards
         -Contrast color approx. 30 yards
Size N (9.0 mm) Crochet Hook
Tapestry Needle
Scissors

Stitch Abbreviations (US Terms):
Ch – Chain
Hdc – Half Double Crochet
Sl St – Slip Stitch

Important Note:
-Ch 1 does not count as hdc and is not included in the stitch count at the end of each row.

Pattern for gauge:

Row 1: Ch 5, hdc in 2nd ch from hook and in each across.
Row 2: Ch 1, turn. Hdc in same and in each across.

Piece should measure approximately 2” x 1 ¼” for gauge. If not, please adjust your tension or hook size to get gauge.


Row 1: Ch 15, hdc in 2nd ch from hook and in each across. (14 hdc)
Row 2-4: Ch 1, turn, hdc in same and in each across. (14 hdc)

Fasten off after row 4. Change to contrast color, join with sl st in same space as fasten off.

Row 5: Ch 1, turn, hdc in same and in each across. (14 hdc)
Row 6: Ch 1, turn, hdc in same and in each across. (14 hdc)

Fasten off. Change back to main color, join with sl st in same space as fasten off.

Row 7: Ch 1, turn, hdc in same and in each across. (14 hdc)
Row 8-124: Repeat row 6. (14 hdc)

After row 124 your scarf should measure approx. 72”.

Fasten off and change to contrast color, join with sl st in same space as fasten off.

Row 125: Ch 1, turn, hdc in same and in each across. (14 hdc)
Row 126: Ch 1, turn, hdc in same and in each across. (14 hdc)

Fasten off. Change back to main color, join with sl st in same space as fasten off.

Row 127-129: Ch 1, turn, hdc in same and in each across. (14 hdc)

Fasten off and sew in ends.


Above is the completed men's chunky stripe set, you can find the free beanie pattern here:

Thursday, September 1, 2016

Free Crochet Pattern: Men's Chunky Stripe Beanie


This morning I have a simple men's beanie pattern to share and tomorrow I'll have the matching scarf pattern up (you can now find the scarf pattern HERE). Please be sure to check your gauge before starting your hat, getting the correct gauge is important for this pattern.

Thanks for stopping by, happy crocheting! 
Jenni


Difficulty Level: Easy

Size: Men’s, 22-23” head circumference

Supplies:
Bernat Chunky Yarn, Super Bulky (6)
      -Main color approx. 100-105 yards
      -Contrast color approx. 20-25 yards
Size N (9.0 mm) Crochet Hook
Tapestry Needle
Scissors

Stitch Abbreviations (US Terms):
Ch - Chain
Dc - Double Crochet
Hdc - Half Double Crochet
Sc - Single Crochet
Ss - Slip Stitch
St(s) - Stitch(es)

Important Notes:
-Ch 1 does not count as a stitch and is not included in the stitch count at the end of each row.
-All joins are made with ss to the first hdc/dc of the row.

Pattern for gauge:

Row 1: Ch 12, dc in 3rd ch from hook and in each ch across.
Row 2: Ch 1, turn. Hdc in each st across.

The piece should measure approximately 4” x 1 ½” for gauge. If not, please adjust your tension or hook size to get gauge.


Row 1: Magic circle, ch 1, 10 dc in circle. Join. (10)

Pull circle tight and sew in end.

Row 2: Ch 1, 2 hdc in each st around. Join. (20)
Row 3: Ch 1, dc in 1st st, 2 dc in next st. *Dc in next st, 2 dc in next st.* Repeat *to* around. Join. (30)
Row 4: Ch 1, 2 hdc in 1st st, hdc in next 2 sts. *2 hdc in next st, hdc in next 2 sts.* Repeat *to* around. Join. (40)
Row 5: Ch 1, 2 dc in 1st st, dc in next 4 sts. *2 dc in next st, dc in next 4 sts.* Repeat *to* around. Join. (48)

Your circle should measure approx. 7” across the center.

Row 6: Ch 1, hdc in each st around. Join. (48)
Row 7: Ch 1, dc in each st around. Join. (48)
Row 8: Ch 1, hdc in each st around. Join. (48)
Row 9: Ch 1, dc in each st around. Join. (48)
Row 10: Ch 1, hdc in each st around. Join. (48)
Row 11: Ch 1, dc in each st around. Join & fasten off. (48)

Switch to contrast color and join with a ss in any st.

Row 12: Ch 1, hdc in each st around. Join. (48)
Row 13: Ch 1, hdc in each st around. Join. (48)

Fasten off, switch to main color and join with a ss in any st.

Row 14: Ch 1, sc in each st around. Join. (48)
Row 15: Ch 1, sc in each st around. Join, fasten off and sew in ends. (48)

Tuesday, July 19, 2016

Free Crochet Pattern Tutorial: Deer Head Applique

(Shown in 
(top row) Caron Simply Soft Pink, Hobby Lobby I Love this Yarn Orange Neon, Caron Simply Soft Blue
(bottom row) Red Heart Super Saver Coffee, Cafe Latte, Red Black & Deborah Norville Oak Moss)

I’ve made quite a few of these appliques for hats but they would also be adorable on a blanket, pillow or even a sweater! You may use just about any worsted weight yarn you would like for this project! Following the pattern is a full photo tutorial, I suggest scrolling through the photo tutorial before getting started.

Thanks for stopping by! 
-Jenni


Skill Level: Easy

Finished size (with gauge): 3 ½” in height and 2 ½” in width

Supplies:
Size G (4.0mm) Crochet Hook
Worsted Weight Yarn, approx. 6-8 yards
Tapestry needle
Scissors

Stitch Abbreviations (U.S. Terms):
Ch – Chain
Sc – Single Crochet
Sc2tog – Single Crochet 2 together
Sc3tog – Single Crochet 3 together
Sl st – Slip Stitch

Stitch Explanation:
Sc2tog – Insert hook in first stitch, yarn over, pull up loop (2 loops on hook). Insert hook into next stitch, yarn over, pull up loop (3 loops on hook). Yarn over and pull through all 3 loops.
Sc3tog – Insert hook in first stitch, yarn over, pull up loop (2 loops on hook). Insert hook into next stitch, yarn over, pull up loop (3 loops on hook). Insert hook into next stitch, yarn over, pull up loop (4 loops on hook). Yarn over and pull through all 4 loops.

Gauge:
6 sc and 3 rows = 1”

Head

Row 1: Ch 12, sc in 2nd ch from hook and in each across. Ch 1. (11 sc)

Rotate piece to the right so you can work on the opposite side of the foundation ch.

Row 2: Sl st in 3, ch 1, sc in next and 4 more. Leave last 3 stitches unworked. Ch 1. (5 sc)
Row 3: Sc in first and in each across. Ch 1, turn. (5 sc)
Row 4: 2 Sc in first, sc in 3, 2 sc in last. Ch 1, turn. (7 sc)
Row 5: 2 Sc in first, sc in 5, 2 sc in last. Ch 1, turn. (9 sc)
Row 6: Sc2tog, sc in 5, sc2tog. Ch 1, turn. (2 sc2tog, 5 sc)
Row 7: Sc2tog, sc in 3, sc2tog. Ch 1, turn. (2 sc2tog, 3 sc)
Row 8: Sc in first and in each across. Ch 1, turn. (5 sc)
Row 9: Sc2tog, sc in 1, sc2tog. Ch 1, turn. (2 sc2tog, 1 sc)
Row 10: Sc3tog.

Do NOT turn piece, rotate piece to the right. Ch 1 and sc along the side until you get to the corner by the ear. Sl st in corner, sc in next and in each across, you should have 3 sc.

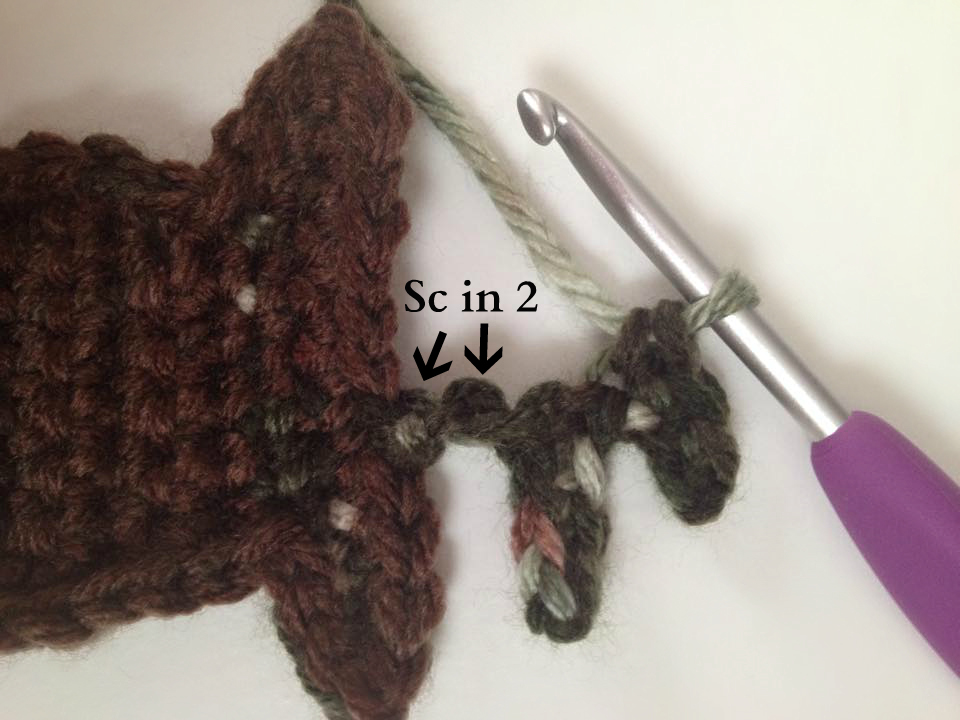
Ch 2, continue rotating piece to the right as you work around. Now you will be working on the opposite side of ear, sl st in first open stitch. Sc in next and in 9 more (10 sc total).

Sl st in last, ch 2. Continue rotating piece and you will now be working under the 2nd ear. Sl st across and in corner space (4 sl st total).

Now sc around the last side and join with sl st to first sc.
Fasten off leaving long end if sewing to another article.

Antlers

You will now be joining yarn to the top of the head to start the antlers. Join with a sl st in the 5th stitch from the right (on top of the head). Ch 7, sc in 2nd ch from hook and in 3 more. Ch 4, sc in 2nd from ch from hook and in 2 more. Sc into next open ch on original ch 7, sc in next. Sl st into next open stitch on head, sl st one more.

Ch 6, sc in 2nd ch from hook and in 2 more. Ch 5, sc in 2nd ch from hook and in 3 more. Sc into next open ch on original ch 6, sc in next. Sl st into next open stitch on head and fasten off, if you have made the antlers a different color than the head be sure to leave the end long enough for the purpose of sewing the applique on to another article.

Nose 
(optional)

Magic Circle, Ch 1, 6 sc. Join, fasten off leaving long enough end for sewing.


Photo Tutorial 

Head 

Row 1: Ch 12, sc in 2nd ch from hook and in each across. Ch 1. (11 sc)

(click image to enlarge)

Rotate piece to the right so you can work on the opposite side of foundation ch.
 Row 2: Sl st in 3, ch 1, sc in next and 4 more. Leave last 3 stitches unworked. Ch 1. (5 sc) 


Turn Piece. 
Row 3: Sc in first and in each across. Ch 1. (5 sc) 


 Turn piece. 
Row 4: 2 Sc in first, sc in 3, 2 sc in last. Ch 1. (7 sc) 


 Turn piece. 
Row 5: 2 Sc in first, sc in 5, 2 sc in last. Ch 1. (9 sc) 


 Turn piece. 
Row 6: Sc2tog, sc in 5, sc2tog. Ch 1. (2 sc2tog, 5 sc) 


 Turn piece. 
Row 7: Sc2tog, sc in 3, sc2tog. Ch 1. (2 sc2tog, 3 sc) 


 Turn piece. 
Row 8: Sc in first and in each across. Ch 1. (5 sc) 


 Turn piece. 
Row 9: Sc2tog, sc in 1, sc2tog. Ch 1. (2 sc2tog, 1 sc) 


 Turn piece. 
Row 10: Sc3tog.


Do NOT turn piece. 
 Ch 1 and sc along the side until you get to the corner by the ear. 
Sl st in corner, sc in next and in each across, you should have 3 sc. 


Ch 2, continue rotating piece to the right. 
Now you will be working on the opposite side of ear, sl st in first open stitch.


 Sc in next and in 9 more (10 sc total). 
 Sl st in last, ch 2. 


Continue rotating piece and you will now be working under the 2nd ear. 
 Sl st across and in corner space (4 sl st total). 


 Now sc around the last side and join with sl st to first sc. 
 Fasten off leaving a long end if sewing on to another piece. 


 Antlers 

Holding head piece right side up; join with a sl st in the 5th stitch from the right. 


Ch 7. 


 Rotate piece to the right and sc in 2nd ch from hook, sc in 3 more. 


 Ch 4.  


Sc in 2nd from ch from hook and in 2 more. 


 Sc into next open ch on original ch 7. Sc in next. 


 Sl st into next open stitch on head, sl st in one more. 


 Ch 6.


Sc in 2nd ch from hook, sc in 2 more. 


 Ch 5. 


 Sc in 2nd ch from hook and in 3 more. 


 Sc into next open ch on original ch 6. Sc in next. 


 Sl st into next open stitch on head and fasten off. 
If you have made the antlers a different color than the head be sure to leave one of these ends long for the purpose of sewing the applique on to another article.


Below are are few examples of how I have put this applique to use, I'd love to see how you have used this pattern! Feel free to share on facebook @ www.facebook.com/byjennidesigns or Ravelry @ www.ravelry.com/patterns/library/deer-head-applique


Friday, July 1, 2016

Free Crochet Pattern Tutorial: Army Tank Applique

(for yarn color info. scroll to the bottom of this post)

This army tank applique was created for my son who loves all things army. After creating it, it received his seal of approval! You can change up this little applique many ways and use almost any yarn you would like for it. Following the written pattern is a photo tutorial, I suggest scrolling through the photo tutorial before starting the pattern.

Thanks for stopping by!
-Jenni Catavu 

Skill Level: Easy/Intermediate

Finished size: (with gauge): 4” x 2 ¼”

Supplies:
15-20 yards of worsted weight yarn in choice of 3 colors (I recommend Red Heart With Love or Hobby Lobby I Love This Yarn)
       -C1 = Track Color (tutorial shows grey)
       -C2 = Body Color (tutorial shows green)
       -C3 = Tire Color (tutorial shows black)
Size F (3.75 mm) Crochet Hook
Tapestry Needle
Stitch Marker
Scissors

Stitch Abbreviations (US Terms):
BLO – Back Loop Only
Ch – Chain
Dc – Double Crochet
FLO – Front Loop Only
Hdc – Half Double Crochet
RS – Right Side
Sc – Single Crochet
Sk – Skip
Sl St – Slip Stitch
Sp – Space

Important Notes:
-Joins are made with sl st.
-Ch 1 does NOT count as a stitch.
-This pattern uses the magic circle (aka magic ring), if you don't know how to make one you can learn with my short video here: https://www.youtube.com/watch?v=64O9WVJucFA

Gauge:
5 sc and 4 rows = 1”

Pattern for gauge:

Row 1: Ch 6, sc in 2nd ch from hook and in each across. Ch 1, turn. (5 sc)
Row 2-3: Sc in same and in each across. Ch 1, turn. (5 sc)
Row 4: Sc in same and in each across. (5 sc)

Piece should measure 1” x 1”, gauge is not extremely important for this pattern unless you want your applique to be the finished size listed (4” x 2 ¼”).


Track

With C1:

Row 1: Ch 14, sc in 2nd ch from hook and in each across. Ch 1, turn. (13 sc)
Row 2: Sc in same and in each across. Ch 1, turn. (13 sc)

After turning; place a stitch marker in the back loop of the first space. You will be working in the BLO later and will be starting the row in this back loop.

Row 3: In FLO: Sc in same, ch 2, sl st to top of sc. *Sc in next 3, ch 2, sl st to top of sc.* Repeat *to* across (5 spikes made). Sl st in same sp as last sc.

Working in both loops now:

Rotate piece to the right so you can work along the side of rows 1-3. Sl st once so you are at about the middle. In the same sp: [Ch 1, sc, sl st], sl st in next. This sl st is also in the same sp you will be working in for the next group of stitches after rotating piece.

Rotate piece to the right and in the first sp: [Ch 1, sc, ch 2, sl st to top of sc]. *Sc in next 3, ch 2, sl st to top of sc.* Repeat *to* across (5 spikes made). Sl st in same sp as last sc.

Rotate piece to the right and work along the side of rows 1-3. Sl st once so you are at about the middle. In the same sp: [Ch 1, sc, sl st], sl st in next. Fasten off leaving a long end for sewing.

Note: The side facing you currently is the RS.


Body

With C2:

With RS facing you, join with a sl st in the space that was indicated to place a stitch marker in row 3 of the track. You can now remove the stitch marker.

Row 1: In BLO: Ch 1, dc in same and in each BLO across. Ch 1, turn. (13 dc)
Row 2: Dc in same and in each across. Turn. (13 dc)
Row 3: Sk 1st sp, sl st in next 3, sk 2, 6 dc in next, sk 2, sl st in next and 3 more.

Rotate piece to the right so you can work on the side of rows 1-2. Ch 1, sl st twice down the side, this should bring you to about the middle. Ch 8, hdc in 2nd ch from hook and in each across (7 hdc total), sl st in the same sp that your chain began in. Fasten off leaving long end for sewing.

Tires (make 3):
Or use 3 (15 mm) buttons.

With C3:

Magic Circle (or ch 3, join), ch 1, 6 sc in circle. Pull circle tight, join. Fasten off & sew on to track.

Optional: Stitch on a little star to the tank or sew on a small 7mm star button.

If sewing on to another piece:
Use your tapestry needle and sew down starting with the end indicated to leave long on the track. Sew through each spike. Next use the other end indicated to leave long and sew around the entire body of the tank starting with the gun. Sew in ends.


 PHOTO TUTORIAL 

 Track 

 With C1

Row 1: Ch 14, sc in 2nd ch from hook and in each across. 

(click images to enlarge)
 

 Ch 1, turn. 

 Row 2: Sc in same and in each across. Ch 1, turn. 


 After turning; place a stitch marker in the back loop of the first space. You will be working in the BLO later and will be starting the row in this back loop. 


Row 3: In FLO: Sc in same, ch 2. 


Sl st to top of sc.


 Continue to work this entire row in FLO. 

*Sc in next 3, ch 2, sl st to top of sc.* Repeat *to* across. Sl st in same sp as last sc.


Rotate piece to the right so you can work along the side of rows 1-3. 


 Working in both loops now:

Sl st once so you are at about the middle. 


 In the same sp: [Ch 1, sc, sl st] 


 Sl st in next. 
This sl st is also in the same sp you will be working in for the next group of stitches after rotating piece. 


Rotate piece to the right and in the first sp: [Ch 1, sc, ch 2, sl st to top of sc]. 


*Sc in next 3, ch 2, sl st to top of sc.* Repeat *to* across. 


Sl st in same sp as last sc.


 Rotate piece to the right and work along the side of rows 1-3.
 Sl st once so you are at about the middle.


 In the same sp: [Ch 1, sc, sl st], Sl st in next.
Fasten off leaving a long end for sewing.


 Note: The side facing you is the RS.

 Body 

 With C2:

With RS facing you, rotate piece to the right and use your fingers to hold down the spikes so you can work in the back loops easily that were left unworked previously. Join with a sl st in the space that was indicated to place a stitch marker in row 3 of the track.


 You can now remove the stitch marker.
Row 1: Ch 1, dc in same and in each BLO across.


 Ch 1, turn.
 Row 2: Dc in same and in each across.


 Turn.
 Row 3: Sk 1st sp,


 Sl st in next 3, sk 2, 6 dc in next.


 Sk 2, sl st in next and 3 more.


 Rotate piece to the right so you can work on the side of rows 1-2.


 Ch 1. Sl st twice down the side, this should bring you to about the middle.


 Ch 8.


 Hdc in 2nd ch from hook and in each across (7 hdc total).


 Sl st in the same sp that your chain began in.


 Fasten off leaving long end for sewing. At this time you can also sew in the two shorter ends to get them out of the way.


Tires
(make 3)

Or use 3 (15 mm) buttons

 With C3:

Magic Circle, ch 1, 6 sc in circle. Pull circle tight, join.


Fasten off. Sew your tires on to the track, sew in ends from tires.


 Optional: Stitch on a little star to the tank or sew on a small 7mm star button.


 If sewing on to another piece:

 Use your tapestry needle and sew the applique down starting with the end indicated to leave long on the track. Sew through each spike. Next use the other end indicated to leave long and sew around the entire body of the tank starting with the gun. Sew in ends.